


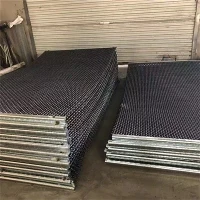


Hey there! As a supplier of crimped wire mesh, I've seen my fair share of damaged meshes over the years. Whether it's due to wear and tear, accidental damage, or some other reason, a damaged crimped wire mesh can be a headache. But don't worry! In this blog, I'm gonna share some tips on how to repair damaged crimped wire mesh.


Understanding Crimped Wire Mesh
First off, let's quickly go over what crimped wire mesh is. Crimped wire mesh is made by weaving wires together, with each wire having a series of bends or "crimps". These crimps help hold the wires in place and give the mesh its structure. There are different types of crimped wire mesh, like Crimped Woven Wire Mesh, Heavy Duty Woven Wire Mesh, and Stainless Steel Woven Wire Mesh, each with its own unique properties and uses.
Assessing the Damage
The first step in repairing damaged crimped wire mesh is to assess the extent of the damage. Is it a small hole, a few broken wires, or a large section that's completely torn? This will help you determine the best repair method.
- Small Holes and Minor Tears: If you've got a small hole or a minor tear in the mesh, you can usually fix it without too much hassle. You'll just need some spare wire, wire cutters, and pliers.
- Larger Holes and Extensive Damage: For larger holes or extensive damage, you might need to replace a section of the mesh. This will require more tools and a bit more time, but it's still doable.
Repairing Small Holes and Minor Tears
Here's a step-by-step guide on how to repair small holes and minor tears in crimped wire mesh:
- Gather Your Materials: You'll need some spare wire that matches the gauge and material of your existing mesh, wire cutters, and pliers.
- Prepare the Area: Use the wire cutters to trim any loose or frayed wires around the hole or tear. Make sure the edges are clean and smooth.
- Weave in the Spare Wire: Cut a length of spare wire that's long enough to span the hole or tear. Starting at one end, weave the wire through the existing mesh, following the same pattern as the original wires. Use the pliers to bend the wire into place and secure it.
- Trim the Excess Wire: Once you've woven the wire through the entire hole or tear, use the wire cutters to trim any excess wire. Make sure the ends are flush with the mesh.
- Check the Repair: Give the repaired area a gentle tug to make sure the wire is securely in place. If it feels loose, go back and tighten it up.
Repairing Larger Holes and Extensive Damage
If you're dealing with a larger hole or extensive damage, you'll need to replace a section of the mesh. Here's how to do it:
- Measure and Cut the Replacement Mesh: Use a tape measure to determine the size of the area that needs to be replaced. Cut a piece of replacement mesh that's slightly larger than the damaged area.
- Remove the Damaged Section: Use the wire cutters to carefully cut out the damaged section of the mesh. Make sure to cut along the existing wires to keep the edges clean.
- Position the Replacement Mesh: Place the replacement mesh over the hole and align it with the existing mesh. Use the pliers to bend the edges of the replacement mesh around the existing wires to hold it in place.
- Secure the Replacement Mesh: Use wire to stitch the replacement mesh to the existing mesh. Start at one corner and work your way around, weaving the wire through the mesh and tying it off at regular intervals. Make sure the stitches are tight and secure.
- Trim the Excess Mesh: Once you've secured the replacement mesh, use the wire cutters to trim any excess mesh. Make sure the edges are flush with the existing mesh.
- Check the Repair: Give the repaired area a thorough inspection to make sure the replacement mesh is securely in place and the stitches are tight. If there are any loose wires or gaps, go back and fix them.
Preventing Future Damage
Now that you've repaired your crimped wire mesh, it's important to take steps to prevent future damage. Here are some tips:
- Proper Installation: Make sure the mesh is installed correctly and securely. Use the right tools and techniques to ensure a tight fit.
- Regular Maintenance: Inspect the mesh regularly for signs of wear and tear. If you notice any damage, repair it as soon as possible to prevent it from getting worse.
- Avoid Overloading: Don't put too much weight or pressure on the mesh. Make sure it's used within its intended load capacity.
- Protect from the Elements: If the mesh is exposed to the elements, consider applying a protective coating to prevent rust and corrosion.
Conclusion
Repairing damaged crimped wire mesh doesn't have to be a difficult task. With the right tools, materials, and a little know-how, you can fix small holes and tears or replace larger sections of the mesh. By following the tips in this blog, you can keep your crimped wire mesh in good condition and prevent future damage.
If you're in the market for high-quality crimped wire mesh, we're here to help. We offer a wide range of Crimped Woven Wire Mesh, Heavy Duty Woven Wire Mesh, and Stainless Steel Woven Wire Mesh to meet your needs. Contact us today to discuss your requirements and get a quote.
References
- "Crimped Wire Mesh: A Comprehensive Guide" - Industry Journal
- "Repair and Maintenance of Wire Mesh Products" - Technical Handbook