


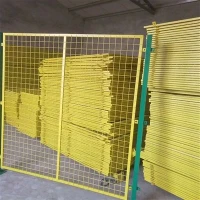
When it comes to safety fences, not only is the quality and design of the fence crucial, but the painting process also plays a significant role. As a safety fence supplier, I've witnessed firsthand the importance of a well - painted safety fence. It not only enhances the aesthetic appeal but also provides protection against corrosion and other environmental factors. In this blog, I'll share with you a step - by - step guide on how to paint a safety fence.
Step 1: Preparation
Before you start painting, it's essential to prepare the fence properly. This preparation work will ensure better paint adhesion and a more durable finish.
Inspection: First, thoroughly inspect the safety fence. Check for any signs of damage, such as loose wires, bent sections, or rust spots. For example, if you're dealing with a Prison Perimeter Security Fence, it's crucial to make sure that all components are in good condition, as any damaged parts can compromise the security function. If you find any damaged areas, repair them before painting. You can use wire cutters, pliers, and welding tools to fix loose wires or bent sections. For rust spots, use a wire brush to remove the rust.
Cleaning: After inspection and repair, clean the fence. Dirt, dust, grease, and other contaminants can prevent the paint from adhering properly. You can use a pressure washer with a mild detergent to clean the fence. For stubborn stains, you may need to scrub the affected areas with a brush. Rinse the fence thoroughly with clean water and allow it to dry completely. This usually takes a few hours, depending on the weather conditions.
Masking: If there are any parts of the fence that you don't want to paint, such as hardware or areas near other structures, use masking tape and plastic sheeting to cover them. This will ensure a clean and professional - looking finish.
Step 2: Choosing the Right Paint
Selecting the appropriate paint is vital for a long - lasting and effective paint job.
Type of Paint: For safety fences, exterior - grade paints are recommended. Acrylic latex paints are a popular choice because they are durable, weather - resistant, and easy to clean. They also come in a wide range of colors, allowing you to choose the one that best suits your needs. Enamel paints are another option. They provide a hard, glossy finish that is highly resistant to scratches and abrasions.
Color Selection: The color of the paint can be chosen based on several factors. If the fence is for a Workshop Isolation Fence, you may choose a bright color like yellow or orange to increase visibility. For a more discreet or aesthetic purpose, such as a fence in a residential area, you can choose a neutral color like brown or gray.
Paint Quantity: Calculate the amount of paint you need based on the size of the fence. The paint can label usually provides information on the coverage area per gallon. Measure the length, height, and width of the fence and use the provided formula to estimate the paint quantity. It's better to buy a little more paint than you think you'll need to account for any touch - ups.
Step 3: Priming (Optional but Recommended)
Applying a primer can significantly improve the adhesion of the paint and provide additional protection to the fence.
Primer Selection: Choose a primer that is compatible with the type of paint you'll be using and the material of the fence. For metal fences, a metal - specific primer is recommended. It helps to prevent rust and provides a smooth surface for the paint.
Primer Application: Use a paintbrush or a paint roller to apply the primer evenly to the fence. Start from the top and work your way down. Make sure to cover all surfaces, including the inside and outside of the wires or panels. Allow the primer to dry according to the manufacturer's instructions, which is usually a few hours.


Step 4: Painting
Once the primer is dry (if you used one), it's time to start painting.
Painting Tools: You can choose between a paintbrush, a paint roller, or a paint sprayer, depending on the size and complexity of the fence. A paintbrush is suitable for small areas and detailed work, such as painting around corners and joints. A paint roller is faster for large, flat surfaces. A paint sprayer can provide a more even and professional finish, but it requires more skill and proper ventilation.
Painting Technique: If you're using a paintbrush or a roller, start at the top of the fence and work your way down in long, smooth strokes. Overlap each stroke slightly to ensure even coverage. If you're using a paint sprayer, hold the sprayer at a consistent distance from the fence and move it in a steady back - and - forth motion. Apply multiple thin coats of paint rather than one thick coat. This will help to prevent drips and ensure a more durable finish. Allow each coat to dry before applying the next one. The drying time can vary depending on the paint type and weather conditions.
Step 5: Drying and Curing
After the final coat of paint is applied, it's important to let the fence dry and cure properly.
Drying Time: The initial drying time can take a few hours to a day, depending on the paint type and environmental conditions. During this time, avoid touching or disturbing the fence to prevent smudging or damage to the paint.
Curing Time: The curing process is different from drying. Curing is when the paint fully hardens and reaches its maximum durability. This can take several days to weeks. It's best to wait until the paint is fully cured before subjecting the fence to heavy use or harsh weather conditions.
Step 6: Maintenance
Once the fence is painted, regular maintenance can help to keep it looking good and functioning properly.
Inspection: Periodically inspect the fence for any signs of paint damage, such as peeling or chipping. If you notice any issues, touch up the affected areas as soon as possible to prevent further damage.
Cleaning: Clean the fence regularly with a mild detergent and water to remove dirt and debris. This will not only keep the fence looking clean but also help to extend the life of the paint.
As a safety fence supplier, we offer a wide range of high - quality safety fences, including Prison Perimeter Security Fence, Workshop Isolation Fence, and Railway Wire Fence. We also provide professional advice on painting and maintaining these fences. If you're interested in purchasing our safety fences or have any questions about the painting process, we encourage you to reach out to us for a consultation. Our team of experts is always ready to assist you in finding the best solutions for your safety fence needs.
References
- "Painting Exterior Metal Fences" - Home Repair Manual
- "Selecting the Right Paint for Outdoor Structures" - Paint Manufacturer's Guide
- "Fence Maintenance and Painting Tips" - Gardening and Home Improvement Magazine